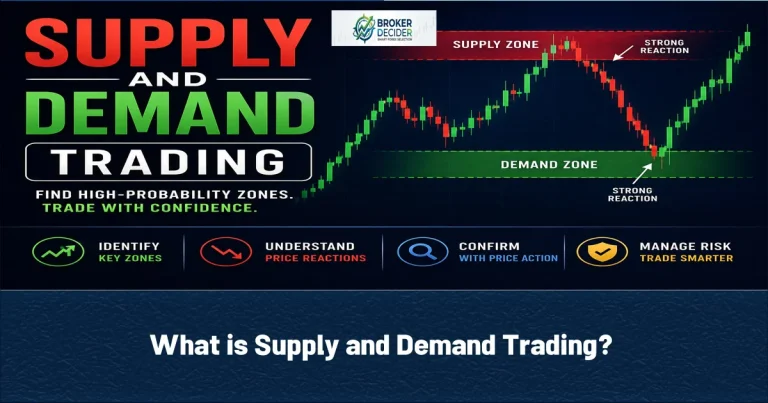
Supply and Demand Trading is a price action perspective built around identifying the areas where buying or selling pressure was once strong enough to create a significant market move. Rather than leaning primarily on technical indicators, traders study these zones to spot potential entries, exits, and risk management opportunities. This article is about what Supply and Demand Trading really means, how demand and supply zones form, how to spot them on a chart, and how the concept fits alongside Smart Money Concepts and Order Blocks.
Supply and Demand Trading
The core idea is completely simple: when demand surpass supply, prices tend to rise, and when supply surpass demand, prices tend to fall. By pinpointing where these imbalances occurred in the past, traders try to anticipate where the market might react again in the future.
The Importance of Supply and Demand
Financial markets move because buyers and sellers are constantly interacting. When one side becomes noticeably stronger than the other, price often leaves an area quickly, leaving behind a visible imbalance. Supply and Demand Trading helps traders identify high-interest price zones, improve trade timing, plan stop-loss and take-profit levels, read price action more clearly, complement broader market analysis, and build more structured trading strategies. Rather than chasing a fast-moving market, many traders would simply rather wait for price to come back to one of these zones.
The Concept of Supply
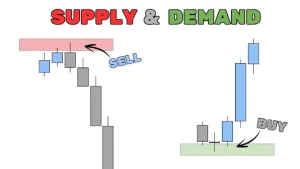
Supply represents an area where selling pressure once outweighed buying pressure, producing a sharp downward move. When price returns to that same area, traders often watch closely for signs of renewed selling interest. Typical characteristics include brief consolidation, a strong bearish breakout, and clear momentum carrying price away from the zone.
The Concept of Demand
A Demand is an area where buying pressure previously overwhelmed selling pressure, sending price higher in a hurry. When price revisits this area later on, some traders expect buyers to step back in. A genuine Demand Zone is usually marked by a period of consolidation, followed by a strong bullish move, with very little overlap between the candles involved. Generally speaking, the stronger the departure from the zone, the more attention traders tend to give it.
The Formation of Supply and Demand Zones
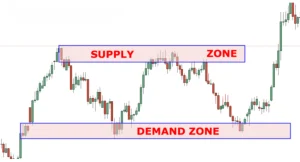
Supply and Demand zones generally develop in three stages. First comes consolidation, where price pauses as buyers and sellers briefly reach equilibrium. Next comes an imbalance, where one side gains the upper hand and pushes price aggressively in its favored direction. Finally, a strong departure is what actually creates the Supply or Demand zone traders monitor going forward. Markets often return to revisit these areas before continuing along their broader trend.
Identifying Supply and Demand Zones
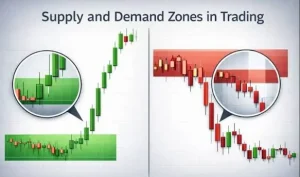
For Identifying Supply and Demand Zones, follow these steps:
| Step 1 | Start With a Higher Timeframe | Daily and four-hour charts tend to reveal stronger zones than lower timeframes do, since higher-timeframe levels generally draw more attention from the broader market. |
| Step 2 | Find Strong Impulsive Moves | Look for areas where price accelerated rapidly. Large candles with minimal overlap are usually a good sign of strong buying or selling pressure at work. |
| Step 3 | Mark the Base | Identify the small consolidation area that sits immediately before the impulsive move. That base becomes the actual Supply or Demand zone. |
| Step 4 | Wait for Price to Return | Many experienced traders deliberately avoid entering during the initial breakout. Instead, they wait for price to revisit the zone and look for confirmation before committing to a trade. |
Supply & Demand vs. Support & Resistance
Look at the table below to understand the difference between Supply & Demand and Support & Resistance:
| Supply & Demand | Support & Resistance |
| Uses zones rather than precise lines | Often drawn as horizontal levels |
| Emphasizes strong departures | Emphasizes repeated reversals |
| Focuses on imbalance | Focuses on historical reaction levels |
| Common in price action and SMC | Common in traditional technical analysis |
Smart Money Concepts and Supply and Demand
Within Smart Money Concepts (SMC), Supply and Demand zones are rarely analyzed on their own. Traders typically combine them with Market Structure, Liquidity, Liquidity Sweeps, Order Blocks, Fair Value Gaps (FVG), Break of Structure (BOS), and Change of Character (CHOCH). A Demand Zone that lines up with a bullish Market Structure and a nearby Order Block, for instance, tends to draw far more attention than an isolated Demand Zone sitting on its own. This layered approach helps traders weigh context instead of leaning on any single technical concept.
Trading with Supply and Demand and its Common Mistakes
Common Mistakes of traders when using Supply and Demand are:
- Drawing too many zones: Not every consolidation creates a meaningful Supply or Demand area.
- Ignoring Market Structure: Trading against the dominant trend just because price reaches a zone adds unnecessary risk.
- Entering without confirmation: Price simply touching a Supply or Demand zone doesn’t automatically create a valid setup. Many traders wait for confirmation through candlestick patterns, Market Structure, or momentum.
- Forgetting higher timeframes: Higher-timeframe Supply and Demand zones generally carry more weight than lower-timeframe ones, so it’s worth starting analysis there before refining entries.
Advantages and disadvantages of using Supply and Demand zones
| Advantages of using Supply and Demand zones | Disadvantages of using Supply and Demand zones |
| Improves entry precision | False reactions do occur |
| Complements Smart Money Concepts | Strong trends can simply break straight through a zone |
| Works across multiple financial markets | Different traders may draw different zones |
| Can be combined with other trading methods | Economic news can invalidate technical levels |
| Uses clean, straightforward price action | Confirmation is essential before acting |
| Supports better risk management | *** |
Supply & Demand Trading vs. Order Blocks
| Supply & Demand | Order Blocks |
| Highlights buying and selling imbalances | Focuses on areas of institutional order flow |
| Often broader zones | Often more precise areas |
| A traditional price action concept | An ICT and Smart Money Concepts idea |
| Usually based on strong departures | Usually based on the final opposite candle before an impulsive move |
Conclusion about Supply and Demand Trading
Supply and Demand Trading helps traders identify areas where buying or selling pressure has previously shifted market direction. By focusing on zones of imbalance rather than individual indicators, traders can better understand market behavior and plan trades with far more structure.
Recommended Brokers for Forex Trading
These brokers can be suitable for forex trading. However, you should always take the risks of trading into consideration.
Sign Up with Errante Sign Up with Orbex Sign Up with HYCM
Source: Investopedia